


In many businesses, certain operations should not be completed by every user without authorization. For example, a sales quotation may need to be reviewed by a sales manager before it can be confirmed, or a sensitive transaction may require approval from a specific department.
Instead of handling these approvals through emails, messages, or manual follow-ups, Odoo 19 Studio allows approval controls to be added directly to existing buttons and workflows.
With Studio approval rules, you can decide who is allowed to authorize an action, whether approval should come from a particular user or user group, and whether additional approval steps are required before the action can be completed.
This article explains how to configure such an approval workflow in Odoo 19 using a sales order confirmation as an example.
What Are Approval Rules in Odoo 19?
Approval rules allow an organization to place an authorization layer on top of an existing Odoo operation.
For instance, suppose sales employees are allowed to create quotations, but management wants every quotation to be reviewed before it becomes a confirmed sales order.
Instead of restricting access to the entire Sales Order form, an approval rule can be attached specifically to the Confirm button.
This provides a more controlled workflow:
Sales User → Creates Quotation → Requests Confirmation → Approver Reviews → Order Confirmed
The same concept can be applied to different buttons and business operations depending on the requirements of the organization.
Odoo 19 Studio also supports multiple approval stages, allowing businesses to create workflows where more than one person or group must authorize an operation.
Why Use Approval Rules?
Approval rules can be useful when a company wants tighter control over important transactions without introducing a complicated custom development process.
Some common scenarios include:
- Sales orders requiring management approval
- Purchase transactions requiring department authorization
- Discount approvals
- Expense approvals
- Important record status changes
- Financial or operational actions requiring management review
- Multi-level authorization workflows
The main advantage is that the approval requirement becomes part of the Odoo workflow itself rather than being managed separately.
Step 1: Open the Sales Order Form
First, open the Sales application and create or open a quotation.
The quotation form contains the Confirm button that normally changes the quotation into a confirmed sales order.
To configure an approval rule for this action, activate Studio from the Odoo interface.
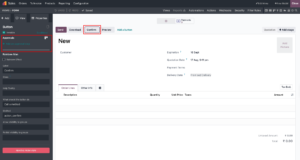
Step 2: Select the Button That Requires Approval
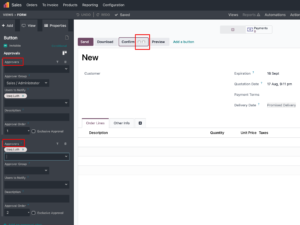
Once Studio is active, click the Confirm button on the sales order form.
Odoo Studio will display configuration options for the selected button.
Look for the option related to configuring approval rules and choose:
Add an approval step
This allows an approval layer to be attached to the selected button.
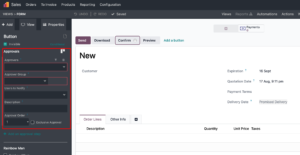
Step 3: Define the Approver
After adding an approval step, Odoo provides options for deciding who should authorize the action.
Depending on the company’s workflow, the approval can be assigned to:
- A specific Odoo user
- A user group
For example, if all sales orders must be reviewed by the Sales Manager, the appropriate user or group can be selected as the approver.
This is particularly useful when the approval responsibility belongs to a department rather than one individual employee.
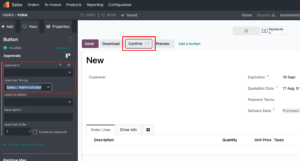
Step 4: Configure Notifications
The approval configuration can also be used to notify the relevant users when their approval is required.
This is useful in situations where the person responsible for approval may not be actively monitoring the transaction.
For example:
Salesperson creates quotation → Confirmation requested → Manager receives notification → Manager reviews quotation
This keeps the approval process inside Odoo and reduces the need for manual communication.
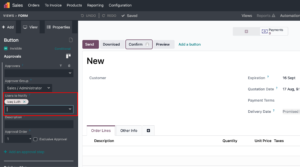
Step 5: Add Additional Approval Levels
A business may require more than one person to authorize a transaction.
For example, a company could have the following approval structure:
Level 1: Sales Manager
Level 2: Finance Manager
Level 3: General Manager
Odoo Studio allows additional approval steps to be added to the same button.
Use the option to add another approval step and configure the next responsible user or group.
You can therefore create a sequential approval workflow without creating a separate custom approval application.
Step 6: Save the Approval Configuration
After defining the required approvers and approval levels, save the Studio customization.
It is recommended to test the configuration with a normal user account rather than immediately testing with an administrator account.
This helps confirm that the approval restriction is actually being applied to users who are not authorized to perform the action directly.
Step 7: Test the Workflow as a Normal User
Now log in using a user who is not configured as an approver.
Create a new quotation and enter the required sales information.
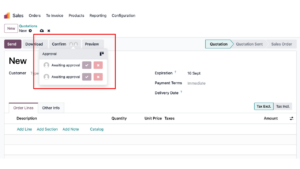
When the user attempts to click Confirm, Odoo will recognize that the action requires approval.
Instead of allowing the transaction to proceed immediately, the system will display the approval requirement.
This ensures that the configured authorization process is enforced at the point where the restricted action is attempted.
Step 8: Review the Approval Status
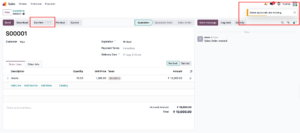
Odoo provides visibility into the approval process from the transaction itself.
An approval indicator can be used to inspect the current approval status and understand whether the required authorization has been completed.
This makes it easier for users to identify why an operation has not yet been completed.
Step 9: Open the Approval Details
Clicking the approval information allows users to see additional details about the configured approval step.
Depending on the configuration, this can show information such as:
- Approval responsibility
- Assigned approver
- Current approval status
- Approval stage
- Pending approvals
This provides better visibility into where the transaction currently stands.
Step 10: Approver Reviews the Request
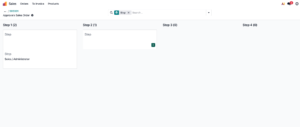
The designated approver can now review the transaction before authorizing it.
For example, the Sales Manager may check:
- Customer information
- منتجات
- Quantities
- Pricing
- Discounts
- Payment terms
- Delivery information
After reviewing the transaction, the approver can complete the assigned approval.
Step 11: Track the Approval in the Chatter
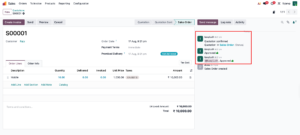
Odoo’s chatter provides a useful audit trail for the approval process.
Once an approval has been completed, the related activity or approval information can be reflected in the chatter.
This gives users a historical view of the workflow and makes it easier to understand who participated in the authorization process.
Advantages of Using Studio Approval Rules
Using Studio for approval control provides several practical benefits.
1. No Custom Development
Approval rules can be configured through the Odoo Studio interface without writing custom Python code.
2. Better Transaction Control
Important operations can be protected from being completed without the required authorization.
3. Multiple Approval Levels
Businesses can establish sequential approval workflows involving multiple users or groups.
4. Improved Visibility
Users can see whether an action is waiting for approval and identify the relevant approval stage.
5. Centralized Workflow
The approval process remains inside Odoo instead of depending on external emails or informal communication.
6. Better Accountability
Approval activities provide greater visibility into who was responsible for reviewing an operation.