


Managing employee leave through emails, spreadsheets, or paper forms can quickly become difficult for growing businesses. Employees need an easy way to check their available leave, while managers need a clear process to review and approve requests.
The Odoo 19 Time Off module brings the complete leave management process into one place. Employees can check leave balances, request time off, upload supporting documents, and track their request status. Managers can review pending requests and approve or refuse them through a structured approval workflow.
In this step-by-step guide, we’ll explain how to apply for leave in Odoo 19, check available Time Off balances, track existing requests, and complete the manager approval process.
What Is the Odoo 19 Time Off Module?
Odoo 19 Time Off is an employee leave management application designed to centralize information related to employee absences.
Businesses can use it to manage different types of Time Off, such as:
- Paid Time Off
- Sick Time Off
- Compensatory Days
- Vacation Leave
- Unpaid Leave
- Organization-specific leave types
Depending on the organization’s configuration, individual Time Off Types can have different allocation rules and approval requirements.
This allows HR teams to define policies while giving employees and managers better visibility into the leave process.
Understanding the Odoo 19 Time Off Dashboard
When employees open the Time Off application, the Dashboard gives them a quick overview of their leave information.
The dashboard can also be accessed from:
Time Off → My Time → Dashboard
It provides employees with visibility into their Time Off balances, scheduled leave, requests, and calendar.
Instead of contacting HR every time they need to know their remaining leave, employees can check the information directly from Odoo.
Check Available Time Off Balance
The top section of the dashboard displays balance information for the Time Off Types assigned to the employee.
For example, an employee may have:
Paid Time Off — 20 Days Available
Compensatory Days — 16 Days Available
Depending on how the Time Off Type is configured, Odoo can also show information about allocations, approved leave, planned Time Off, and remaining availability.
This makes it easier for employees to decide how much leave they can request before submitting an application.
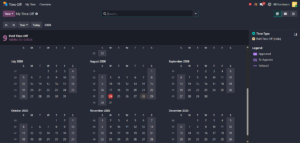
Odoo 19 Time Off dashboard showing employee leave balance
Pending Requests and Allocation Requests
The dashboard also provides information about pending requests.
If an employee has requests waiting for action, they can identify them directly from the dashboard.
Employees may also see a New Allocation Request option.
A Time Off request and an allocation request serve different purposes:
Time Off Request:
The employee requests to use leave that is available to them.
Allocation Request:
The employee requests additional Time Off entitlement.
For example, if an employee has exhausted an eligible leave allocation, the r by Time Off Type
The Time Off Type filters allow users to control what information is displayed on the calendar.
help users distinguish between different request statuses.
Depending on the workflow, you may see statuses such as:
- To Approve
- Second Approval
- Approved
- Refused
This gives employees better visibility into where their request currently stands.
Mandatory Days in Odoo 19
Organizations can configure Mandatory Days within the Time Off application.
These may represent specific company-wide days that employees need to be aware of.
For example:
August 25, 2026 — Company Celebration
Displaying these dates alongside the employee calendar provides additional context when employees plan their Time Off.
How to View Your Time Off Requests in Odoo 19
Employees can view their existing requests by navigating to:
Time Off → My Time → My Time Off
This page provides a list of the employee’s Time Off requests.
Typical information displayed includes:
| Field | What It Shows |
| Time Off Type | Category of leave requested |
| Start Date | Beginning of the requested leave |
| End Date | End of the requested leave |
| Duration | Total requested duration |
| Status | Current approval status |
For example:
Sick Time Off — Aug 24 to Aug 26 — 3 Days — Approved
and
Compensatory Days — Aug 3 to Aug 5 — 3 Days — To Approve
This allows employees to quickly distinguish between approved and pending requests.
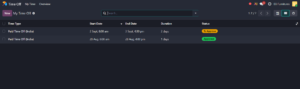
My Time Off page showing employee leave requests and their status.
How to Apply for Leave in Odoo 19
Now let’s look at how an employee can submit a new Time Off request.
Employees can create a request from the main Time Off Dashboard or from the My Time Off page.
From My Time Off, navigate to:
Time Off → My Time → My Time Off → New
Click New to create a new Time Off request.
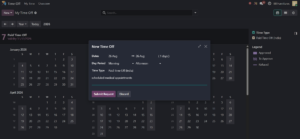
New Time Off request window with leave type, dates, and duration selected.
Step 1: Select the Time Off Type
Start by selecting the appropriate option from the Time Off Type field.
Available options depend on the policies configured by your organization and may include:
- Paid Time Off
- Sick Time Off
- Compensatory Days
- Unpaid Leave
- Vacation Leave
Always select the correct Time Off Type because different leave categories may use different allocations and approval workflows.
Step 2: Select the Leave Dates
Next, select the required start and end dates.
Odoo uses the selected dates and applicable employee schedule to determine the requested duration.
Before submitting the request, check:
- Start Date
- End Date
- Duration
- Time Off Type
- Available balance
Reviewing these details helps prevent incorrect leave submissions.
Step 3: Attach Supporting Documents
Some organizations may require supporting documentation for specific Time Off Types.
For example, internal HR policies might require documentation for certain Sick Time Off requests.
When required, employees can attach the relevant file directly to the Time Off request.
This keeps supporting information connected to the request instead of sending documents separately through email.
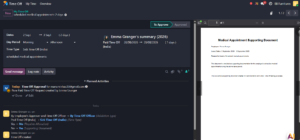
Time Off request with a supporting document attached.
Step 4: Submit the Time Off Request
After reviewing the request details, submit the request.
What happens next depends on the approval settings configured for that particular Time Off Type.
Some Time Off Types may require:
One approval
while others may require:
Two approvals
A Time Off Type configured without an approval requirement can be approved automatically.
A typical approval workflow may look like:
To Approve → Approved
or:
To Approve → Second Approval → Approved
How Does Leave Approval Work in Odoo 19?
Odoo allows businesses to define approval requirements for each Time Off Type.
This means Paid Time Off, Sick Time Off, and other categories do not necessarily need to follow the same approval process.
For example:
Paid Time Off
Employee Request
↓
Manager Approval
↓
Approved
Another leave category could use:
Employee Request
↓
First Approval
↓
Second Approval
↓
Approved
This flexibility enables businesses to align Odoo with their internal HR policies.
How Managers Approve Leave in Odoo 19
Managers or authorized Time Off approvers can review requests that require their action from:
Time Off → Management → Time Off
The Management section is available to users with appropriate approval permissions.
The manager can review information such as:
- Employee
- Time Off Type
- Requested dates
- Duration
- Request status
- Additional notes or supporting information
The manager can then approve or refuse the request.
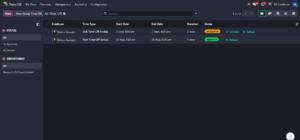
Manager Time Off screen showing requests waiting for approval.
Approving a Time Off Request
Open the pending Time Off request and review the information provided by the employee.
If everything is correct, select the appropriate approval action.
For a Time Off Type requiring one approval, the request can move from:
To Approve → Approved
For a Time Off Type requiring two approvals, the request moves through the additional approval stage before receiving final approval.
Managers can also refuse requests when necessary.
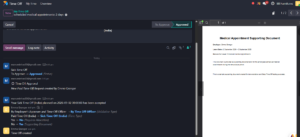
Approved Time Off request showing the updated status.
What Happens After a Leave Request Is Approved?
Once the approval process is completed, the request is reflected in the employee’s Time Off information.
The employee can return to:
Time Off → My Time → Dashboard
or:
Time Off → My Time → My Time Off
to review the approved request.
The employee’s available Time Off is updated according to the applicable allocation and Time Off configuration.
The approved absence can also be reflected in calendar views, making it easier for employees and authorized managers to understand scheduled absences.
Tracking Time Off Activity with Odoo Chatter
Odoo’s Chatter functionality can provide an activity history associated with the Time Off request.
Depending on the workflow and configuration, users may see information related to:
- Request creation
- Status changes
- Approvals
- Refusals
- Activities
- Notifications
This creates a useful record of actions associated with the request and reduces the need to track approval conversations separately through email.
Conclusion
The Odoo 19 Time Off module provides a centralized way for businesses to manage employee leave requests and approvals.
Employees can check their Time Off balances, submit requests, monitor their status, and review previous leave from a single application. Managers can view requests requiring their attention and approve or refuse them through a structured workflow.
With configurable Time Off Types, allocations, approval rules, calendars, mandatory days, and activity tracking, businesses can replace fragmented email and spreadsheet-based leave processes with a more organized system.
Whether you are an employee applying for leave or a manager responsible for approvals, Odoo 19 Time Off provides the tools needed to make the process easier to manage.
Frequently Asked Questions
How do I apply for leave in Odoo 19?
Open Time Off, click New from the Dashboard or navigate to My Time → My Time Off → New. Select the Time Off Type, choose the required dates, complete the request information, and submit it.
Where can I check my leave balance in Odoo 19?
Open the Time Off Dashboard. It displays the Time Off information and available balances associated with your account.
Where can I see my previous leave requests?
Navigate to:
Time Off → My Time → My Time Off
You can view previous and current requests along with their status.
Can a manager approve leave in Odoo 19?
Yes. Authorized approvers can review requests requiring their action under:
Time Off → Management → Time Off
Does every leave request require manager approval?
No. Approval requirements depend on the configuration of the individual Time Off Type. A request can require no approval, one approval, or multiple approval stages depending on the configured policy.
Can employees attach documents to Time Off requests?
Supporting files can be associated with requests where documentation is needed, depending on the form and company process.
Can employees request additional Time Off allocation?
If the relevant configuration and permissions allow it, employees can submit an allocation request for additional Time Off.
What happens after Time Off is approved?
The approved request becomes part of the employee’s Time Off records and the applicable available balance is adjusted according to the Time Off configuration.




2 Comments