
An Odoo database contains much more than customer names and invoices. It stores business records, transactions, users, configuration, and the settings that keep workflows running. Attachments, product images, documents, and other uploaded files are usually stored separately in the filestore.
If a server fails, a database is damaged, or a test environment needs to be recreated, a reliable backup can make recovery much easier. The important part is knowing what to back up, where the backup is stored, and how to restore it without overwriting the wrong database.
This guide explains the main backup and restore methods for Odoo 19 and Odoo 20. It covers the web Database Manager for self-hosted installations, Odoo Online, Odoo.sh, and command-line options for administrators. The exact steps depend on where Odoo is hosted, so start with the section that matches your setup.
What Does an Odoo Backup Include?
A complete Odoo backup normally needs two components: the PostgreSQL database and the filestore. They work together, but they do not store the same information.
| Component | What it contains |
| PostgreSQL database | Business records, accounting entries, contacts, product data, configuration, and other structured information. |
| Filestore | Uploaded files such as attachments, images, documents, and other binary content stored outside database tables. |
| Configuration and custom code | Server configuration, custom addons, dependencies, and deployment settings may need separate backups depending on hosting. |
A database dump without its corresponding filestore may restore records but leave some attachments or images unavailable. For full recovery, confirm the backup includes the filestore or that you have a separate copy.
Choose the Method for Your Hosting Type
| Hosting type | Where to back up | Important note |
| Self-hosted / on-premise | Database Manager or PostgreSQL and filestore procedures | You are responsible for storing and testing backups. |
| Odoo Online | Odoo account database management page | Use backup controls provided by Odoo. |
| Odoo.sh | Project’s Backups tab | Production, staging, and development branches have different backup availability. |
Do not assume one procedure applies to every hosting type. The Database Manager is typically used for self-hosted Odoo, while Odoo Online and Odoo.sh provide hosting-specific controls.
Back Up a Self-Hosted Database Using the Database Manager
Step 1: Open the Database Manager
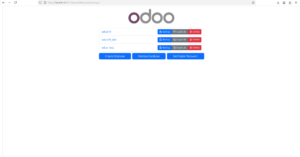
Open your Odoo address and navigate to /web/database/manager. For a local development server, the address may look like http://localhost:8069/web/database/manager, depending on the port and configuration. If the Database Manager is unavailable, the administrator may have disabled it for security.
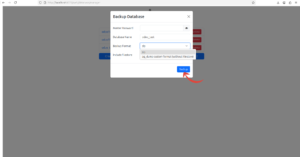
Step 2: Select the database and choose Backup
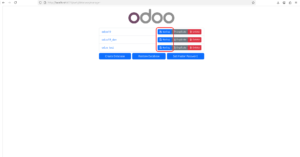
Find the database and select its Backup action. Odoo asks for the server master password, configured in the Odoo server configuration file. This is different from an individual user’s login password.
Step 3: Choose the format
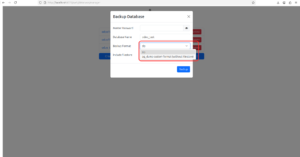
Choose ZIP when you need a portable backup that includes the database dump and filestore. A database-only dump does not replace a backup of uploaded files.
Step 4: Download and store the backup safely
Save the completed backup outside the Odoo server in a secure location. Use a clear filename with database name and date, for example company_backup_2026-10-15.zip. Restrict access because the file may contain sensitive personal, financial, and business information.
Download a Backup from Odoo Online
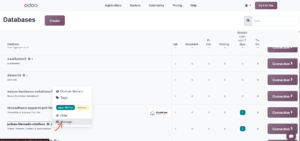
For Odoo Online, use the database management page associated with your Odoo account
- Sign in to your Odoo account and open the database management page.
- Locate the database you want to back up.
- Open its actions menu, commonly represented by a gear icon, and select the available Download or backup option.
- Follow the prompts and save the backup in a secure location.
If the backup is too large to download or the option is unavailable, follow Odoo’s current support instructions. Odoo Online does not support arbitrary custom server modules, so a database intended for migration may need compatibility checks.
Back Up a Database on Odoo.sh
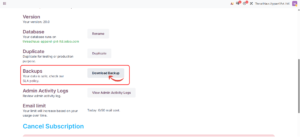
Odoo.sh provides backup controls in the project interface. Odoo’s documentation states that production branches are backed up automatically and that the Backups tab can be used to view, download, restore, and import backups.
- Open your Odoo.sh project and select the production branch.
- Open the Backups tab.
- Review the available backup points and select the required backup.
- Download a copy when you need an external archive, or use the restore/import controls for the intended branch.
Odoo’s documented production retention includes seven daily, four weekly, and three monthly backups. The availability of older monthly backups and manual backups depends on current hosting policy. Staging and development branches do not have the same automatic backup coverage as production.
[SCREENSHOT 4 — Odoo.sh Backups tab] Capture the backup list for a sample project. Remove private project identifiers.
Restore a Database Using the Odoo Database Manager
Step 1: Confirm the backup and target database
Make sure the backup is complete and comes from a compatible Odoo version. Choose a new database name if creating a test copy. Never restore over production unless replacement is the explicit, approved recovery plan.
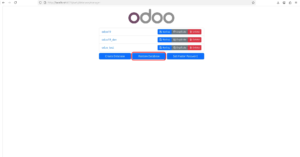
Step 2: Open Restore Database
Navigate to /web/database/manager on the destination server and select Restore Database. If the manager is disabled, use the approved restore process rather than changing production security settings without authorization.
Step 3: Enter the restore details
Enter the server master password, choose the backup file, and specify a unique database name. The restore form may offer options to neutralize the database or mark it as a copy or moved database. Read these carefully before continuing.
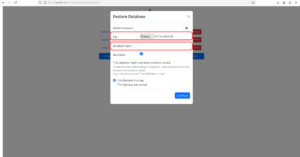
Step 4: Decide whether to neutralize
When restoring production data for testing or staging, use the neutralization option if available and appropriate. It helps reduce the risk of test copies sending real emails or running production automation. It does not replace a review of payment providers, integrations, scheduled actions, and external connections.
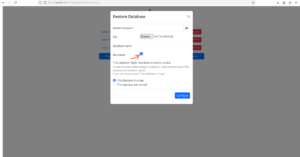
Step 5: Restore and verify
Start the restore and allow it to finish. Large backups can take time. Open the restored database and check key business records, attachments, images, and documents.
Restore a Database on Odoo.sh
Odoo.sh supports restoring backups and importing database archives through the project’s Backups interface. The steps depend on whether you are restoring an existing backup or importing an archive from another environment.
Open the Odoo.sh project and select the target branch.
Open the Backups tab and select the intended backup or choose Import Database.
Confirm the target branch and backup before proceeding.
Wait for the restore or import to finish, then connect to the resulting build and test it.
Important: importing a database overwrites the data currently in the target branch. Download a backup of the target first if you need to preserve its state. After importing, review outgoing email settings and other integrations before allowing users to work with the restored copy.
8. Restore from the Command Line on a Self-Hosted Server
Administrators may use PostgreSQL tools when restoring a database on a server they control. These commands require knowledge of the PostgreSQL role, database name, file paths, and Odoo data directory. Examples below are illustrative; replace sample values and verify the actual dump format first.
Restore a plain SQL dump
Example command for a plain SQL dump:
sudo -u postgres psql -d target_database -f dump.sql
The target database must exist, and the PostgreSQL role must have suitable permissions. This restores database records only; it does not restore a separate filestore.
Restore a PostgreSQL custom-format dump
Example command for a PostgreSQL custom-format archive:
sudo -u postgres pg_restore -d target_database backup.dump
Use pg_restore only for a compatible PostgreSQL custom-format archive. A plain SQL file is normally restored with psql instead. A file extension alone may not prove the format.
Restore the filestore
If the filestore was backed up separately, restore it to the data directory configured for the Odoo service and make sure its directory name matches the restored database name. Correct ownership and permissions are required. The exact path varies by installation and the data_dir setting in Odoo configuration.
Do not drop an existing database unless you have verified the target name, created a separate backup, and have approval. For production, follow a documented maintenance and recovery plan.
What to Check After Restoring
- Confirm the database opens and the expected Odoo version is running.
- Check important records such as customers, products, invoices, sales orders, and employees.
- Open several attachments and images to confirm the filestore is available.
- Check user access, company settings, currencies, and localization.
- Review scheduled actions, outgoing email servers, payment providers, webhooks, and integrations, especially on a test copy.
- Confirm custom modules and dependencies are installed and compatible.
- Check logs for errors and test important end-to-end workflows.
- Record the restore date, source backup, target database, and verification result.
Common Backup and Restore Problems
The Database Manager is unavailable
The administrator may have disabled database management for security. Use hosting controls or the approved server-side backup process. Do not expose the manager publicly just to perform a one-time restore.
The master password is rejected
The master password is configured on the Odoo server and differs from an Odoo user’s login password. Ask the administrator to verify the admin_passwd setting in the active configuration file. Never publish this value.
Attachments or images are missing
The backup may contain only the database, or the filestore may have been restored to the wrong path. Confirm the archive contents, configured data directory, and file permissions.
The backup cannot be restored
Check that the archive is complete, the format is supported, and the destination version is compatible. A restore is not a major-version upgrade; use Odoo’s upgrade process for that.
The test copy sends real emails or runs automation
A production copy can still contain live integrations. Neutralize it when available, then inspect outgoing email, scheduled actions, payment services, and webhooks.
A command-line restore fails with permissions errors
PostgreSQL must be able to access the dump file and parent directories, and the target database must have suitable ownership and privileges. Ask a system administrator to correct permissions.
Backup Best Practices
- Automate backups on a schedule that matches the business’s recovery requirements.
- Keep copies outside the main Odoo server or hosting environment.
- Protect backups with restricted access and encryption where appropriate.
- Back up both the PostgreSQL database and filestore, plus custom code and configuration where needed.
- Retain multiple recovery points rather than keeping only the latest backup.
- Test restoration periodically in a separate environment. An untested backup is not a reliable recovery plan.
- Document who can restore, where backups are stored, and how long recovery should take.
- Before a major upgrade, module update, or migration, create a backup and verify it can be read.
Odoo 19 and Odoo 20: Are the Steps Different?
The main concepts remain the same in Odoo 19 and Odoo 20: back up the database and filestore, store the archive securely, restore to a suitable environment, and verify records and attachments. Hosting controls, interface labels, supported archive formats, and provider-specific options can vary. If you are planning a move to Odoo 20, the Odoo 20 release notes explained cover the main business changes
For a version-specific tutorial, take screenshots from the exact version and identify whether the example is Odoo Online, Odoo.sh, or self-hosted. Do not present a hosting-specific action as available in every installation.
Frequently Asked Questions
How do I back up an Odoo database?
The method depends on hosting. Self-hosted installations can use the Database Manager or approved PostgreSQL and filestore procedures. Odoo Online and Odoo.sh provide their own controls.
Which backup format should I choose?
For a portable Database Manager backup that includes attachments and images, choose ZIP with filestore when available. Database-only dumps need a separate filestore backup if uploaded files must be preserved.
Can I restore a backup into another database name?
Yes, when the restore method supports choosing a target name. Use a unique name for a test copy and verify that you are not replacing production.
Does restoring a backup upgrade Odoo?
No. Restoring is not the same as upgrading to a newer major version. Use Odoo’s official upgrade process.
Why are attachments missing after restoration?
The filestore may not have been included or restored correctly. Verify the archive, configured data directory, database-specific filestore path, and permissions.
Can I restore a production backup for testing?
Yes, into a separate test database. Neutralize it when available and review email, scheduled actions, payment providers, and integrations.
How often should I back up Odoo?
Choose a schedule based on how much data the business can afford to lose and how quickly it must recover. Critical production systems need frequent backups and periodic restore tests.
Conclusion
A dependable Odoo backup plan protects more than database tables. It also accounts for uploaded files, configuration, custom modules, secure storage, and the ability to restore the system when needed.
Use the backup method that matches your hosting environment, choose a format that preserves the filestore when required, and restore to a separate database when testing. Verify records, attachments, integrations, and workflows before declaring recovery complete.
Regular backups and tested recovery procedures make maintenance, upgrades, and unexpected incidents easier to manage.
Odoo 19 Hosting documentation: https://www.odoo.com/documentation/19.0/administration/hosting.html
Odoo 20 Hosting documentation: https://www.odoo.com/documentation/20.0/administration/hosting.html
Odoo.sh – Import a database: https://www.odoo.com/documentation/19.0/administration/odoo_sh/getting_started/create.html
Odoo.sh – Branches and backups: https://www.odoo.com/documentation/19.0/administration/odoo_sh/getting_started/branches.html