


Odoo 20 is an integrated business management platform… In this guide, we will walk you through how to install Odoo 20 on Windows step by step.
Odoo 20 can be installed on Windows, making it a practical option for users who want to explore Odoo locally for development, testing, learning, or business evaluation. Odoo also provides Windows installers through its official download page.
In this guide, we will walk through the Odoo 20 installation process on Windows, from downloading the installer to creating your first Odoo database and accessing the dashboard.
What You Need Before Installing Odoo 20
Before starting the installation, make sure your Windows system has enough resources for the Odoo environment and that you have permission to install software.
Odoo uses PostgreSQL as its database management system. For Odoo 20, the official documentation lists PostgreSQL 16 or later for source installations.
For a standard Windows installation, the installer can guide you through the required database setup.
Basic requirements
You should have:
- A Windows computer or Windows Server
- Administrator access
- A stable internet connection for downloading the required files
- Sufficient disk space
- PostgreSQL database support
- An Odoo 20 Windows installer
Step 1: Download Odoo 20 for Windows
The first step is to download the Odoo 20 Windows installer.
Go to the official Odoo download page and locate Odoo 20. The download page currently provides Windows options for Odoo 20, including Community and Enterprise options.
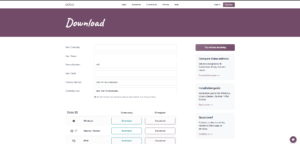
Choose the appropriate Windows download and start the download.

Once the download is complete, locate the installer in your Downloads folder.
The installer will be provided as a Windows executable file.
Step 2: Start the Odoo 20 Installation
Double-click the downloaded Odoo installer to begin the setup.
Windows may ask for permission to allow the installer to make changes to the computer. Select Yes to continue.
The Odoo Setup Wizard will then open.
Click Next to begin the installation process.
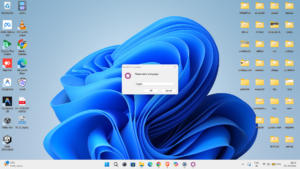
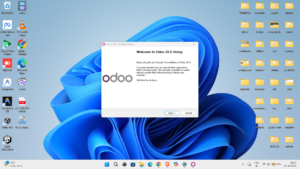
The installer will guide you through the remaining configuration steps.
Step 3: Accept the License Agreement
The setup wizard will display the Odoo license information.
Review the license terms and select I Agree to continue.
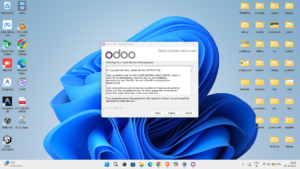
After accepting the agreement, continue through the setup wizard by selecting Next.
Step 4: Configure PostgreSQL
Odoo requires a PostgreSQL database to store application and business data.
During the Windows installation, the setup wizard provides database configuration options. If PostgreSQL is already installed, the installer can use the existing database setup. Otherwise, PostgreSQL can be included during the installation process according to the installer options.
The PostgreSQL configuration requires database connection information such as:
- Host Name
- Port
- Username
- Password
Enter the required details and click Next.
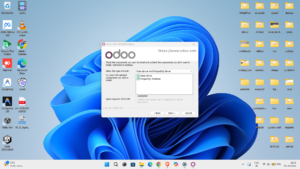
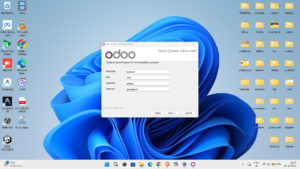
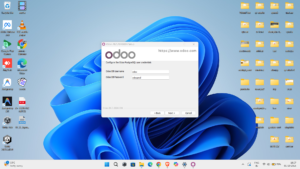
For source-based Odoo 20 installations, the official documentation also confirms PostgreSQL as the required database management system.
Step 5: Choose the Odoo Installation Directory
The installer will ask where Odoo should be installed.
You can use the default installation location or select another folder using the Browse option.
For most users, the default location is sufficient.
Select the desired installation directory and click Next.
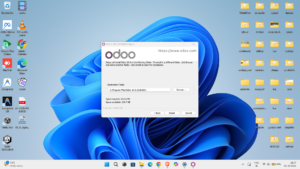
Step 6: Install Odoo 20 on Windows
After reviewing the selected options, click Next to start the installation.
The setup wizard will copy the required Odoo files and complete the necessary configuration.
The installation may take a few minutes depending on your system.
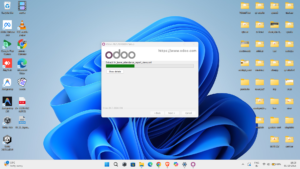
Wait until the installation process is finished.
Once the installation is complete, click Next to continue to the final setup stage.
Step 7: Create the Odoo Database
After installation, the Odoo Database Manager will open.
This is where you can create the database that Odoo will use for your business environment.
You will need to provide information such as:
- Master Password
- Database Name
- Administrator Email
- Administrator Password
The master password is used to manage Odoo databases, while the administrator credentials are used to access the Odoo application.
Enter the required information and select Create Database.
Step 8: Log In to Odoo 20
Once the database has been created, Odoo will take you to the login page.
Enter the administrator email and password created during the database setup.
Click Login to access your Odoo 20 environment.
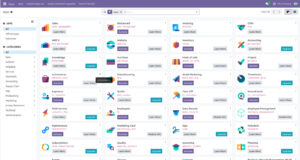
After successful login, you will be taken to the Odoo dashboard.
Step 9: Start Using Odoo 20
After accessing the dashboard, you can install the Odoo applications required for your business.
Depending on your requirements, these may include:
- CRM
- Sales
- Purchase
- Inventory
- Accounting
- Project Management
- Manufacturing
- Human Resources
- Website and eCommerce
Odoo is designed as an integrated suite, allowing different applications to work together within the same ERP environment.
Common Odoo 20 Installation Issues on Windows
Although the Windows installer simplifies the installation process, users may encounter configuration problems.
PostgreSQL connection issues
If Odoo cannot connect to PostgreSQL, check the database host, port, username, and password entered during configuration.
Installation permission problems
If Windows prevents the installer from making changes, make sure you are using an account with the required installation permissions.
Incorrect installation path
If you selected a custom installation directory, verify that the selected folder is accessible and has sufficient storage space.
Odoo does not open after installation
Check whether the Odoo service has started correctly and verify the installation configuration before attempting to restart the application.
For source-based installations, Odoo’s documentation explains that the server can be started on Windows and accessed through http://localhost:8069.
Frequently Asked Questions
- Can Odoo 20 be installed on Windows?
Yes. Odoo provides a Windows download option for Odoo 20, allowing users to install the platform on Windows systems.
- Does Odoo 20 require PostgreSQL?
Yes. PostgreSQL is the database management system used by Odoo.
- Can Odoo 20 be used for development and testing on Windows?
Yes. A local Windows installation can be useful for learning, development, testing, and evaluating Odoo before deploying an ERP environment for business use.
- How do I access Odoo after installation?
After the Odoo server is running, the application can be accessed through a web browser. For source-based Windows installations, Odoo documents http://localhost:8069 as the local address.
Conclusion
Installing Odoo 20 on Windows can be a straightforward process when the required components are configured correctly. The Windows installer guides users through the main installation stages, including Odoo setup, database configuration, installation directory selection, and database creation.
Once the installation is complete, businesses and developers can configure the required Odoo applications and begin exploring the platform.
For production environments, however, installation is only the beginning. Proper ERP configuration, user access management, data migration, customization, integrations, security, backups, and ongoing support should also be considered.
Need Help With Odoo 20 Implementation?
Machinser helps businesses with Odoo implementation, customization, consulting, training, migration, integrations, and support.
Whether you are setting up Odoo for the first time or moving from an existing ERP system, our team can help you evaluate your requirements and build an Odoo environment suited to your business operations.